


Rocks in your yard can be both a nuisance and a hazard. They can damage lawn equipment, hinder grass growth, and make landscaping or gardening difficult. Whether you’re preparing your yard for new sod, installing a garden bed, or just aiming for a smoother, safer lawn, removing rocks is an essential step in yard maintenance. Picking up rocks may seem like a daunting task, but with the right tools, techniques, and strategy, it becomes a manageable project.
This comprehensive guide will walk you through the process of identifying, collecting, and disposing of rocks efficiently, whether your yard is small, large, rocky, or uneven.
Why You Should Remove Rocks from Your Yard
Before diving into the methods, it helps to understand why removing rocks matters.
1. Protect Lawn Equipment
Rocks can damage lawnmowers, trimmers, and aerators. Even small stones can dull blades, break components, or create safety hazards by becoming dangerous projectiles. Even small stones can dull blades or create safety hazards. Following basic lawn mower safety and maintenance guidelines is essential to prevent costly repairs and injuries while clearing your yard.
2. Promote Healthy Grass Growth
Rocks disrupt soil structure, making it difficult for grass roots to spread and absorb nutrients. Removing them improves soil aeration, drainage, and overall plant health.
3. Improve Safety and Aesthetics
Rocks can create uneven ground that causes tripping hazards. They can also make your yard look untidy or unkempt. A rock-free lawn looks cleaner and is easier to maintain.
4. Prepare for Landscaping or Gardening
If you plan to install a flower bed, vegetable garden, or new sod, clearing rocks ensures a smoother, more workable surface for planting and maintenance.
Assessing Your Yard
Before starting, evaluate the size and scope of your project.
1. Identify the Problem Areas
Walk around your yard to locate rocky sections. Rocks often appear near driveways, garden beds, or areas with erosion. Mark sections with stakes or flags so you can tackle them systematically.
2. Determine Rock Type and Size
Your yard may have small gravel-sized stones, medium-sized rocks, or large boulders. Knowing the size and volume will help determine which tools or equipment you’ll need.
3. Decide How Much to Clear
You may not need to remove every rock. Focus on the surface rocks first, then decide if you need to dig deeper for buried stones, especially if you’re preparing the soil for planting.
Tools and Equipment You’ll Need:
The right tools make rock removal easier and safer. Here’s what you might need, depending on the size of rocks in your yard:
For Small to Medium Rocks
- Rake (landscape or bow rake): Helps gather small rocks efficiently.
- Shovel or spade: For digging up embedded stones.
- Garden hoe: Loosens soil and exposes buried rocks.
- Wheelbarrow or garden cart: Transports rocks for disposal or relocation.
- Screen or sifter: Separates rocks from soil if you’re reusing the dirt.
- Buckets or heavy-duty bags: Useful for collecting smaller rocks.
For Large Rocks or Boulders
- Pry bar or digging bar: Leverages large rocks out of the soil.
- Hand truck or dolly: Moves heavy rocks safely.
- Tractor with front loader or rock bucket: For large-scale removal.
- Gloves and safety boots: Protect hands and feet during heavy lifting.
Methods for Picking Up Rocks
Depending on your yard’s condition and the rock size, you can use different methods or a combination for the best results.
1. Manual Removal
For small areas or minor rock issues, hand removal is straightforward.
- Start by raking the surface to gather visible rocks into piles.
- Use a shovel or hoe to loosen soil and uncover buried stones.
- Pick up rocks by hand, wearing gloves to prevent cuts or blisters.
- Load rocks into a wheelbarrow or bucket for transport.
Manual removal is time-consuming but offers precision, ensuring you remove rocks without damaging plants or soil structure.
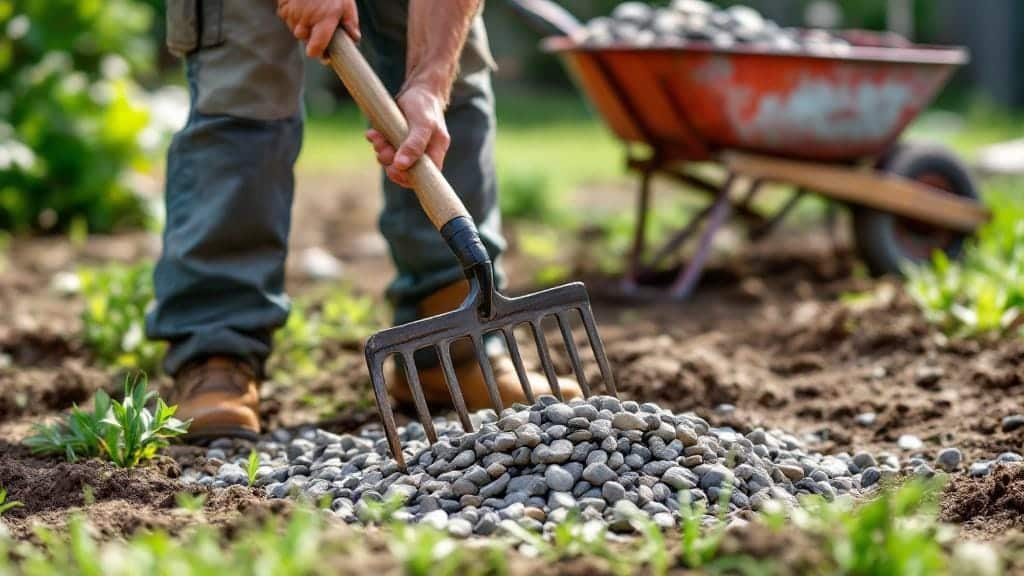
2. Using a Rock Rake or Landscape Rake
Landscape rakes are designed with wide, sturdy tines that gather rocks while leaving most of the soil behind.
- Attach the rake to a tractor or pull it manually.
- Work in sections, pulling rocks toward a central pile.
- Collect and remove piles once finished.
This method is efficient for mid-sized yards with moderate rock distribution.
3. Screening or Sifting Soil
If your soil contains a mix of small stones, screening can help separate them.
- Use a soil sifter or make one with a wire mesh frame.
- Shovel soil onto the screen and shake gently.
- Rocks stay on top, while fine soil passes through for reuse.
This technique is ideal if you plan to reuse soil for gardening or planting after rock removal.
4. Mechanical Rock Removal
For large yards or heavy rock infestations, machines can drastically reduce labor.
- Rock bucket or rock picker: Attach to a tractor to scoop rocks and sift soil simultaneously.
- Rototiller: Breaks up soil, bringing buried rocks to the surface for easier collection.
- Power rake: Levels the soil while collecting debris and stones.
Mechanical methods are faster and more effective for large properties, though they may require rental or professional services.
Dealing with Large Rocks or Boulders
Large rocks can be challenging, but with proper techniques, you can remove or repurpose them safely.
- Dig around the base: Loosen soil with a shovel or digging bar.
- Use leverage: Insert a pry bar beneath the rock and lift gradually.
- Roll or slide: For heavy rocks, use wooden planks or PVC pipes to roll them safely.
- Use machinery: A small tractor, skid steer, or winch can move large rocks more efficiently.
Alternatively, consider incorporating large rocks into your landscaping as decorative features or natural barriers instead of removing them entirely. Creating a garden with big rocks as focal points can add a rugged, natural beauty to your landscape while saving you the heavy labor of hauling them away.
Disposal or Reuse of Rocks
Once you’ve collected the rocks, you’ll need to decide what to do with them.
1. Reuse in Landscaping
- Create rock borders around flower beds or trees.
- Build a rock garden or decorative pathway.
- Use large stones for retaining walls or edging.
Creating rock borders or pathways is a great way to use what you find. However, if your yard rocks are too small or irregular and you need a more polished look, you can find out where to buy river rock in bulk to complete your landscaping project affordably
2. Recycle or Donate
- Offer rocks to neighbors or local gardeners.
- Some landscaping companies accept free rock donations.
3. Dispose Responsibly
- Contact your local waste management service for rock disposal guidelines.
- Transport rocks to a designated landfill or recycling center.
- Avoid dumping rocks in natural areas or drainage systems, as this can cause erosion or flooding.
Preventing Rocks from Returning
After clearing your yard, you’ll want to keep it rock-free as much as possible.
- Install landscape fabric or mulch: Helps suppress new rock surfacing from soil erosion.
- Maintain proper drainage: Prevents soil movement that brings rocks to the surface.
- Regular inspection: Periodically rake or check your yard for new stones, especially after heavy rain or frost cycles.
- Topdress with compost or soil: Filling low spots reduces exposure of buried rocks.
Safety Tips
Safety is the priority when clearing stones. Some essential tips for yard work include always wearing gloves, boots, and eye protection to prevent injuries. Additionally, remember to lift heavy rocks with your legs, not your back, and take breaks frequently to avoid fatigue.
- Always wear gloves, boots, and eye protection.
- Lift heavy rocks with your legs, not your back.
- Take breaks frequently to avoid fatigue.
- If using machinery, follow the manufacturer’s safety guidelines.
- Keep children and pets away from the work area.
Cost Considerations
If you decide to hire professionals or rent equipment, costs vary based on yard size and rock volume.
- Manual labor: $50–$100 per hour for yard crews.
- Tractor or equipment rental: $75–$200 per day.
- Rock disposal fees: $30–$60 per truckload, depending on local regulations.
DIY rock removal is more affordable but requires time and effort. Many homeowners combine manual and mechanical methods to balance cost and efficiency.
Removing rocks from your yard may seem like a big job, but with the right tools and plan, it’s entirely achievable. Start by assessing your yard and gathering essential tools. Use a combination of manual labor, raking, or mechanical assistance to clear your soil efficiently. Once rocks are collected, decide whether to reuse them creatively in landscaping or dispose of them responsibly.
Maintaining a rock-free yard not only improves the appearance of your property but also promotes healthier soil, protects equipment, and enhances safety. Whether you’re preparing for new grass, planting a garden, or simply cleaning up your landscape, a rock-free yard is a cleaner, smoother, and more inviting space for you and your family.