


Hydroponics, the science of growing plants without soil, has become a popular method for home gardeners who want a fast, efficient, and space-saving way to grow fresh produce. While commercial hydroponic systems can be expensive, building your own is surprisingly simple and affordable. Do it yourself hydroponics allows you to customize your garden, save money, and grow healthier plants regardless of climate or soil quality. Whether you want to grow herbs on a kitchen counter or build an entire indoor garden, this guide will explain everything you need to know to get started.
What Is DIY Hydroponics?
DIY hydroponics refers to building your own hydroponic growing system using basic materials such as buckets, plastic totes, air pumps, tubing, and nutrient solutions. Instead of relying on soil, plants receive water, nutrients, and oxygen directly through their roots. This controlled environment creates faster growth, larger yields, and a cleaner gardening experience.
Unlike traditional gardening, hydroponics uses the following:
- Water is the primary growing medium.
- Oxygen to keep roots healthy
- Nutrients delivered directly to the plant
- Light, either natural or artificial
- Space-efficient structures such as tubes, buckets, or towers
DIY hydroponics allows you to design the system that best fits your budget and available space.
Hydroponics, the science of growing plants without soil, has become a popular method for home gardeners who want a fast and efficient way to grow produce.
Why Choose Do-It-Yourself Hydroponics?
Building your own hydroponic setup offers multiple benefits:
1. Cost Savings
Commercial hydroponic kits often cost $100–$500 or more. A simple DIY system can be built for as little as $20–$40 using materials from hardware stores.
A simple DIY system can be built for as little as $20–$40. For a more detailed breakdown of costs, you can read our guide on how to build a cheap hydroponic system using household items.
2. Control and Customization
You can choose the exact size, style, and layout that fits your needs—whether it’s a single-bucket system or a full balcony garden.
3. Faster Plant Growth
Plants in hydroponics grow 30–50% faster than plants in soil because they have direct access to nutrients and oxygen.
4. Less Maintenance
No weeding, no soil pests, and minimal cleaning. Once your system is built, daily upkeep is minimal.
5. Grow Food Anywhere
Hydroponics works indoors, outdoors, on balconies, in garages, or even in closets with grow lights.
6. Water Efficiency
DIY hydroponic systems can use up to 90% less water than soil gardening because the water is recirculated.
These advantages make DIY hydroponics perfect for beginners, hobbyists, and urban gardeners.

Best DIY Hydroponic Systems for Beginners
Before building your setup, you’ll need to choose a system type. Below are the most popular and beginner-friendly designs.
1. Kratky System (No Pumps, No Electricity)
The Kratky method is the simplest hydroponic system ever developed. Plants grow in a container filled with nutrient water. As the plant consumes water, roots extend downward and naturally oxygenate themselves.
Best For: Lettuce, herbs, leafy greens
Cost: $10–$20
Skill Level: Very easy
Pros:
- No moving parts
- No pumps or electricity
- Perfect for beginners
Cons:
- Not ideal for heavy-feeding fruiting plants.
2. Deep Water Culture (DWC)
Plants grow in net pots suspended above oxygenated nutrient water. An air pump adds bubbles to keep roots healthy.
Best For: Lettuce, basil, mint, kale, spinach
Cost: $20–$40
Skill Level: Easy
Pros:
- Fast growth
- Simple to build
- Easy to scale up
Cons:
- Requires electricity
- Roots can suffer if the pump fails.
3. Wick System
A passive hydroponic system where wicks pull water from a reservoir into the grow medium.
Best For: Herbs, small leafy greens
Cost: $10–$25
Skill Level: Easy
Pros:
- No pumps needed
- Popular for small houseplants
Cons:
- Slow nutrient delivery
- Not suitable for large plants
4. DIY Drip Hydroponics
A pump delivers nutrient water through drip lines to each plant. Excess water drains back into the reservoir.
Best For: Tomatoes, peppers, strawberries
Cost: $40–$80
Skill Level: Moderate
Pros:
- Great for larger fruiting plants
- Consistent watering
Cons:
- Most complex beginner system
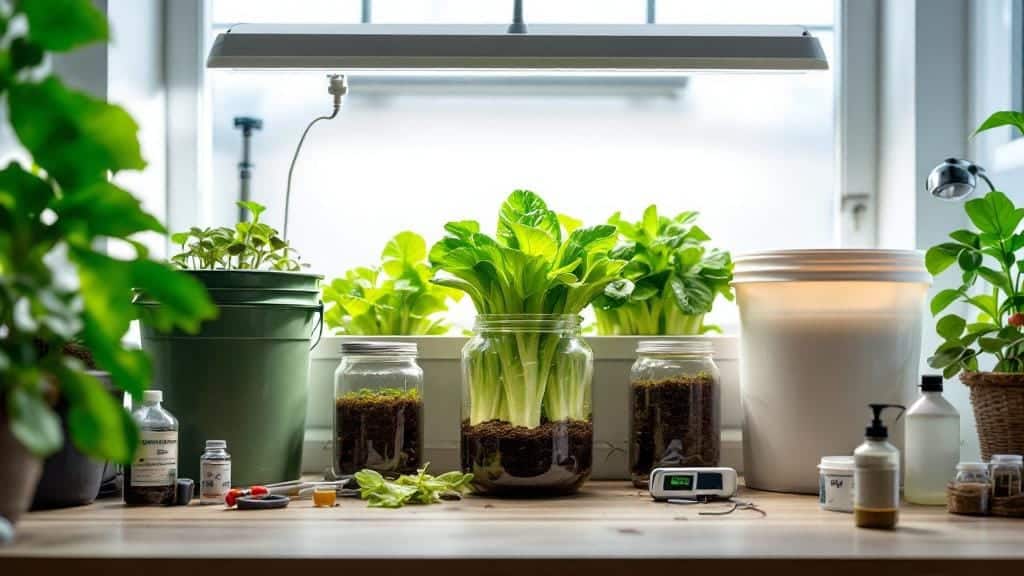
Materials Needed for DIY Hydroponics
No matter which system you choose, most share similar basic components.
Core Materials
- Bucket or plastic storage tote
- Net pots
- Growing medium (clay pebbles, perlite, coco coir)
- Hydroponic nutrients
- Air pump & air stone (for DWC and drip)
- Water reservoir
- pH test kit
- LED grow light (for indoor growing)
Most of these materials are inexpensive and reusable.
How to Build a Simple DIY Hydroponic System (DWC)
Here is a step-by-step guide to building one of the easiest hydroponic systems for beginners.
Step 1: Prepare the Container
Choose a 2–5 gallon bucket or a small storage tote. Ensure it is opaque to prevent algae growth. If it’s clear, wrap it in black tape or paint it.
Cut holes in the lid using a hole saw or sharp knife. Net pots should fit snugly into these holes.
Step 2: Install the Air Pump
Place the air stone at the bottom of the container. Connect the air tubing and run it to the air pump. Keep the air pump outside the container to prevent water damage.
Step 3: Mix the Nutrient Solution
Fill the container with water, leaving 2–3 inches of space at the top. Add hydroponic nutrients per instructions. Most leafy greens thrive in
- pH: 5.5–6.2
- EC: 0.8–1.4
If needed, adjust the pH using pH-Up or pH-Down.
Step 4: Prepare and Insert Plants
Start seeds in a soilless medium such as rockwool or coco plugs. Once seedlings have 2–3 true leaves, transplant them into net pots filled with clay pebbles or perlite.
Place the net pots into the lid. The bottom of the pots should slightly touch the nutrient solution to help roots start growing.
Step 5: Add Lighting
If indoors, position an LED grow light 12–18 inches above the plants. Provide:
- 12–16 hours of light per day
- Blue-leaning spectrum for leafy greens
- Red-leaning spectrum for fruiting plants
Outdoor systems may not need artificial lighting.
Step 6: Turn On the System
Plug in the air pump. Bubbles should rise through the water, providing oxygen to the plant roots. This prevents root rot and speeds up growth.
Your DIY hydroponic system is now operational.
Best Plants to Grow in DIY Hydroponic Systems
Not all plants thrive equally in hydroponics, but many grow exceptionally well.
Ideal Plants for Beginners
- Lettuce
- Spinach
- Kale
- Bok choy
- Basil
- Mint
- Cilantro
- Parsley
- Arugula
Moderate-Difficulty Plants
- Strawberries
- Peppers
- Tomatoes (especially cherry varieties)
- Cucumbers
Plants to Avoid (Hard in Hydroponics)
- Large root vegetables like carrots or potatoes
- Corn
- Woody shrubs
Start simple, then move to more challenging crops.
Maintaining Your DIY Hydroponic System
Hydroponics is low-maintenance, but consistent care ensures maximum yields.
1. Check Water Levels Daily
Plants consume water quickly. Add fresh water to maintain proper levels and prevent nutrient concentration from rising too high.
2. Monitor pH weekly.
Strive to keep pH steady. Fluctuations can slow growth or cause nutrient lockout.
3. Change the Nutrient Solution Every 10–14 Days
Nutrients degrade over time, so keeping the solution fresh ensures healthy growth.
4. Clean the System Monthly
Rinse the container, tubing, and air stone with warm water. Avoid soap, which can harm plants.
5. Watch for Root Health
Healthy roots are white and crisp. Brown, slimy roots may indicate the following:
- Low oxygen
- Warm water
- Poor sanitation
Add more air or lower the water temperature if needed.
Troubleshooting Common DIY Hydroponic Problems
1. Yellow Leaves
Often caused by nutrient deficiencies or poor pH balance.
Check nutrient strength and pH immediately.
2. Algae Growth
Caused by light exposure in the reservoir.
Keep containers covered and opaque.
3. Wilting Plants
May indicate pump failure or low oxygen.
Check the air pump and water temperature.
4. Slow Growth
Often a lighting issue.
Increase light intensity or duration.
Do it yourself hydroponics is one of the easiest, most rewarding ways to grow fresh food at home. With just a few inexpensive materials and basic tools, you can build a productive hydroponic system that grows vegetables, herbs, and even fruits year-round. DIY hydroponics saves money, conserves space and water, and allows growers of all experience levels to enjoy clean, vibrant, healthy plants.