As climate change accelerates and urban areas continue to expand, adopting sustainable landscaping practices is more important than ever. One effective way to manage stormwater runoff, improve biodiversity, and enhance the beauty of your property is by creating a rain garden. This eco-friendly solution channels rainwater into specially designed gardens that not only reduce the risk of flooding but also support local ecosystems. In this article, we’ll guide you through the process of how to create a rain garden, detailing its numerous benefits and offering practical tips to help you get started.
What is a Rain Garden?
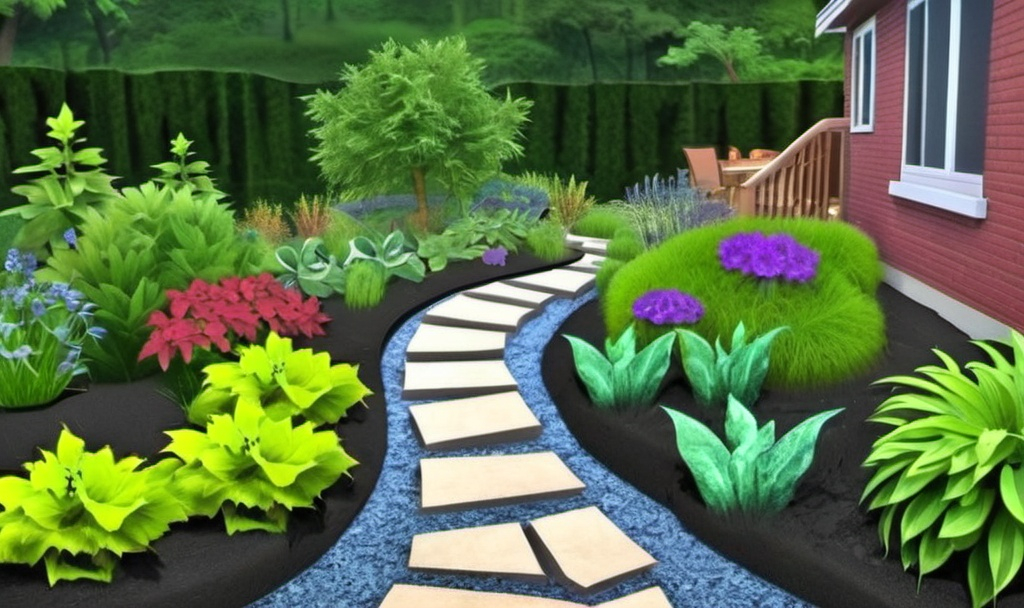
A rain garden is a type of garden designed to collect, absorb, and filter rainwater runoff from impervious surfaces like roofs, driveways, and streets. Instead of allowing rainwater to flow into storm drains, a rain garden channels the water into a depressed area filled with native plants that thrive in wet conditions. These plants not only beautify the landscape but also help prevent flooding, reduce pollution, and recharge groundwater.
Rain gardens are often considered a form of Low Impact Development (LID), a set of strategies that aim to mimic natural hydrological processes and reduce the environmental impact of urbanization. They play a crucial role in stormwater management by allowing water to naturally infiltrate the ground rather than overwhelming storm drains or causing erosion.
Benefits of Creating a Rain Garden
Stormwater Management: One of the primary functions of a rain garden is to capture rainwater runoff before it enters the stormwater system. This helps reduce the risk of flooding, prevents soil erosion, and minimizes the chances of water pollution reaching local water bodies.
Water Conservation: Rain gardens absorb rainwater, which can then be used by plants to thrive, reducing the need for supplemental irrigation. By capturing rainwater, these gardens reduce the strain on municipal water systems and help conserve water resources.
Wildlife Habitat: By planting native plants in your rain garden, you can provide habitat for local wildlife such as birds, bees, butterflies, and other pollinators. Native plants are especially beneficial because they are adapted to local growing conditions and support a diverse range of species.
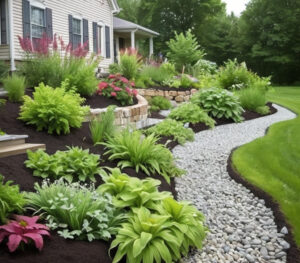
Improved Aesthetic Value: Rain gardens are not only functional but also beautiful. By incorporating a variety of colors, textures, and heights in your design, you can create a striking landscape that enhances the visual appeal of your property.
Reduced Pollution: When rainwater flows over impervious surfaces like roads and sidewalks, it picks up pollutants such as oils, fertilizers, and trash. Rain gardens help filter out these pollutants before they reach nearby streams and rivers, improving the overall quality of water.
Support for Local Ecosystem: Native plants have deep root systems that help to improve soil structure and promote healthy ecosystems. They prevent soil erosion, allow water to infiltrate, and reduce the need for chemical fertilizers or pesticides. if you need information about how to create a thriving,wildlife-friendly garden on budget then check out this
How to Create a Rain Garden: Step-by-Step Guide
Creating a rain garden can be an enjoyable and rewarding DIY project. With the right preparation and a little guidance, you can design a beautiful and functional rain garden that benefits both the environment and your property. Here are the steps to follow:
1. Evaluate Your Property and Choose the Right Location
Before you begin digging, take the time to assess your property. Look for areas where rainwater naturally collects or where runoff is most likely to occur. Ideal spots for rain gardens include:
- Near downspouts or gutters
- Low-lying areas that tend to collect water
- Areas where water flows off driveways, patios, or roofs
However, avoid placing your rain garden too close to the foundation of your home or any other structures. It’s best to locate your garden at least 10 feet away from buildings to prevent water from seeping into your home’s foundation.
2. Determine the Size of Your Rain Garden
The quantity of runoff you anticipate managing will determine the size of your rain garden.. A general rule of thumb is that the rain garden should cover about 20% to 30% of the area that receives runoff. You can calculate the size by measuring the square footage of your rooftop, driveway, or patio that generates rainwater runoff. For example:
For a small house (1000 sq. ft.), the rain garden might be about 200-300 sq. ft.
Larger homes or properties with extensive impervious surfaces may require a larger garden.
Keep in mind that the garden’s depth should vary, with the center of the garden being slightly lower than the edges to encourage water to pool and slowly infiltrate the soil.
3. Plan the Layout and Design
Once you’ve selected a location and determined the size, it’s time to plan the layout and design of your rain garden. Consider the following:
Shape: While rain gardens can be any shape, they are often irregular and natural in appearance. A curved, organic shape blends well with the landscape.
Slope: The garden should have a gentle slope to allow water to flow toward the center. If your property is on a slope, you may need to create a berm or a small wall around the garden to direct the water.
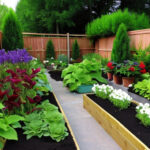
Plant Placement: Plant taller species in the center and shorter species along the edges. This will not only create a visually appealing arrangement but also ensure that all plants get the proper amount of water.
4. Prepare the Soil and Dig the Garden Bed
To create an effective rain garden, you’ll need to prepare the soil and dig out a depression in the ground. Here’s how to do it:
Dig the Bed: Dig a hole in the selected area to a depth of about 4-8 inches. If the soil is compacted, you may need to dig deeper to allow for better water infiltration.
Amend the Soil: Rain gardens work best with well-draining soil, so you may need to amend the soil with compost, sand, or gravel to improve drainage. Mix in 20-30% sand or compost to increase infiltration and create a loamy texture.
5. Select the Right Plants
Choosing the right plants is crucial to the success of your rain garden. Opt for native plants that can tolerate both wet and dry conditions. Native plants are typically better suited for your region and can handle the fluctuating moisture levels in a rain garden.
Best Plants for Rain Gardens:
Wet-Tolerant Plants:
- Swamp milkweed (Asclepias incarnate)
- Blue flag iris (Iris versicolor)
- Joe-Pye weed (Eutrochium purpureum)
- Sedge (Carex species)
Drought-Tolerant Plants:
- Coneflower (Echinacea purpurea)
- Black-eyed Susan (Rudbeckia hirta)
- Butterfly weed (Asclepias tuberosa)
- Prairie dropseed (Sporobolus heterolepis)
A diverse mix of flowering plants, grasses, and shrubs will create a visually appealing and ecologically balanced rain garden. Make sure to arrange the plants in zones based on their moisture needs (moisture-loving plants in the center and drought-tolerant plants along the edges).
6. Install a Mulch Layer
Mulching is an important step in creating a rain garden. A 2-3 inch layer of organic mulch, such as wood chips or shredded bark, helps retain moisture, suppress weeds, and prevent soil erosion. Be sure to keep the mulch away from the base of plants to prevent rot.
7. Direct Water Flow into the Garden
Now that your garden is ready, you need to direct the water flow into the garden. You can install a downspout extension or create a small channel to carry the water into the rain garden. The key is to make sure the water flows gently into the garden, allowing time for the soil to absorb it.
8. Maintain the Rain Garden
Once your rain garden is established, it will require some maintenance. Regular tasks include:
Weeding: Pull weeds periodically to prevent them from overtaking the garden.
Watering: Initially, you may need to water your plants until they become established. Once they’re rooted, the rainwater will typically be sufficient.
Pruning: Trim dead or overgrown plants to keep the garden looking neat and healthy.
Mulching: Refresh the mulch as needed, particularly after heavy rainfalls.
if you need further information about then check out this
Conclusion: Sustainable Landscaping with a Rain Garden
Creating a rain garden is a simple yet impactful way to contribute to environmental conservation while enhancing the beauty of your landscape. By following the steps outlined above, you can create a garden that captures stormwater runoff, promotes biodiversity, and supports local ecosystems. Whether you’re concerned about water conservation, reducing pollution, or improving the aesthetic value of your property, a rain garden offers a sustainable solution for homeowners and communities alike.
Remember, the key to success lies in careful planning, choosing the right location, selecting appropriate plants, and proper maintenance. By taking these steps, you’ll not only have a functional rain garden but also be doing your part to help the environment. Start your sustainable landscaping journey today by creating your rain garden!


1 thought on “How to Create a Rain Garden: A Sustainable Landscaping Option”