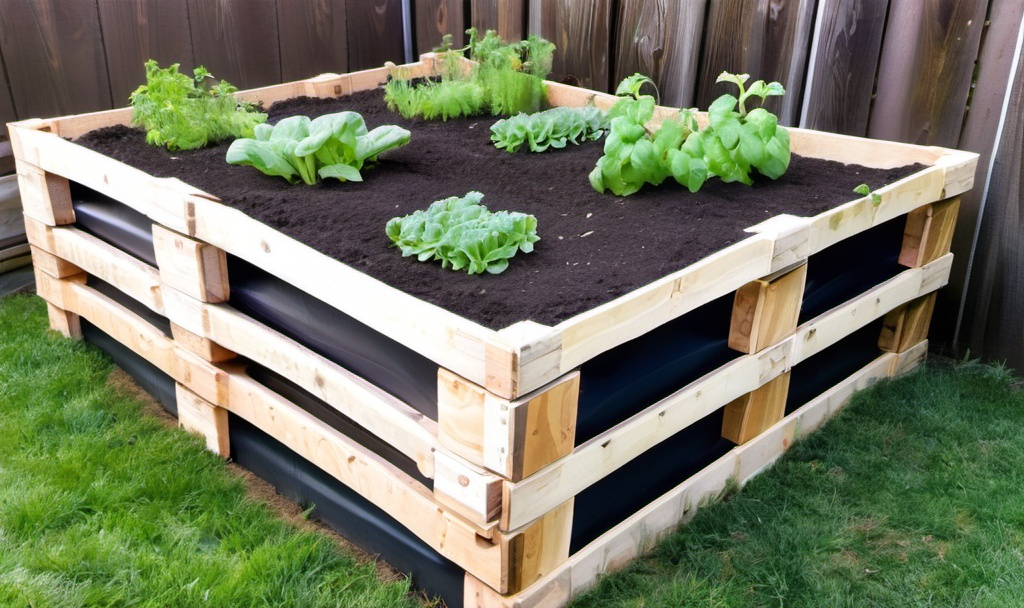
If you’re looking to enhance your gardening experience while also making a stylish, eco-friendly, and cost-effective addition to your outdoor space, building a raised garden bed with pallets could be the perfect solution. Raised garden beds provide a variety of benefits, including improved drainage, better soil quality, and less strain on your back while gardening. Plus, using pallets makes the process more affordable and sustainable.
In this article, we’ll guide you through the steps on how to build an easy raised garden bed with pallets, whether you’re a seasoned gardener or a beginner. You’ll discover the materials you need, the steps involved, and some tips for making your raised garden bed as efficient and attractive as possible.
Why Choose Pallets for Raised Garden Beds?
Before diving into the “how-to” part, let’s explore why pallets are an excellent material choice for raised garden beds.
Cost-Effective: Pallets are often free or very inexpensive, making them a budget-friendly option compared to other materials like lumber or stone.
Sustainable: Using recycled pallets helps reduce waste and gives a second life to materials that would otherwise end up in a landfill.
Versatile and Easy to Work With: Pallets are easy to find, and they come in a variety of sizes and conditions. You can also modify them to fit your garden’s needs.
Quick Construction: Building a raised garden bed with pallets is relatively straightforward, even for those with little carpentry experience. It’s a quick way to set up your garden.
Materials Needed for Building a Raised Garden Bed with Pallets. To get started, you’ll need a few basic materials:
Wooden Pallets: Ideally, look for pallets that are still in good condition with no large cracks or signs of significant damage. You’ll need enough pallets to create the sides of your garden bed. The number of pallets depends on the size of the bed you want to build.
Screws or Nails: Use weather-resistant screws or nails to assemble your pallets. This ensures that the structure is sturdy and can withstand outdoor conditions.
Gardening Soil: You’ll need a good quality soil mix to fill the raised bed. A mixture of compost, topsoil, and peat moss is often ideal for raised beds.
Landscape Fabric (Optional): This is optional, but it helps to prevent weeds from growing through your raised bed.
Drill and Saw (Optional): If you need to make adjustments to the pallets or cut them to a specific size.
Measuring Tape and Level: To ensure your garden bed is square and level.
Step-by-Step Guide: How to Build an Easy Raised Garden Bed with Pallets
Now that you know what materials you need, let’s break down the process of building your own raised garden bed with pallets. if you need information about How to Build an Easy Raised Garden Bed with Pallets then check out this
Step 1: Choose a Location
Before you start assembling your pallets, it’s important to select a location for your raised garden bed. Consider the following factors:
Sunlight: Make sure the location gets plenty of sunlight throughout the day, as most plants require at least 6-8 hours of sunlight to thrive.
Drainage: The location should have good drainage, or you might need to adjust it later by adding gravel or drainage holes in your pallets.
Accessibility: Make sure the spot is easily accessible for watering, weeding, and harvesting your crops.
Once you’ve chosen the perfect spot, measure out the area where you want to place the garden bed. Having an exact size in mind will help you determine how many pallets you’ll need.
Step 2: Select the Right Pallets
As mentioned, you’ll need to gather a few pallets to create the sides of your garden bed. Pallets come in various sizes, but the most common type is the 48” x 40” size. Depending on how large or small you want your bed, you might need to adjust the size of the pallets.
Here are a few tips for selecting the right pallets:
Look for dry pallets. Damp pallets can be weak and prone to rotting. Check for stamps on the pallets. Some pallets are treated with chemicals, which may not be ideal for gardening purposes. Look for pallets with the stamp “HT” (Heat Treated), which indicates that they’ve been heat-treated rather than chemically treated. Make sure the pallets are free of splinters and cracks. This will ensure that your raised garden bed is sturdy and safe.
Step 3: Assemble the Pallets
Once you’ve got your pallets, the next step is to assemble them into a garden bed. Here’s how:
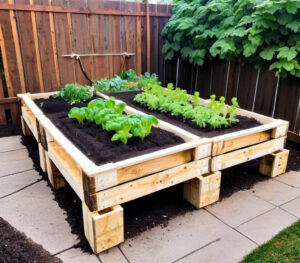
Position the Pallets: Lay your pallets on the ground where you’ve marked the garden bed area. You can arrange them in a square or rectangular shape, depending on the size you want.
Stack the Pallets: If you want a taller raised bed, you can stack two or more pallets on top of each other. This will give your bed extra depth, which is beneficial for root growth. However, if you’re building a lower bed, a single layer of pallets should suffice.
Secure the Pallets Together: Use screws or nails to secure the corners of the pallets. This will ensure that your garden bed is sturdy and holds its shape. If necessary, use a drill to pre-drill holes for the screws to make the process easier.
Check for Level: Use a level to check that your pallets are even. Adjust them as needed to ensure the sides of the bed are aligned and straight.
Step 4: Add Landscape Fabric (Optional)
If you want to prevent weeds from growing through the bottom of your raised garden bed, consider adding landscape fabric. This material will act as a barrier and keep weeds at bay.
Cut the Landscape Fabric: Measure the bottom of your garden bed and cut the fabric to fit.
Lay the Fabric: Place the fabric at the bottom of the garden bed, covering the entire area.
Secure the Fabric: You can staple or tack the fabric to the inside of the pallets to keep it in place.
Step 5: Fill the Bed with Soil
With the bed structure in place, it’s time to fill it with soil. The quality of soil you use is crucial for the health of your plants. A good soil mix should be rich in organic matter, well-draining, and have plenty of nutrients.
Layer the Soil: Start by adding a layer of compost or organic matter at the bottom of the bed. This will help improve soil fertility over time.
Top with Garden Soil: Next, fill the bed with a mixture of garden soil and compost, ensuring that the bed is full and level. Aim for about 12-18 inches of soil, depending on the size of the bed and the types of plants you want to grow.
Moisten the Soil: Once you’ve filled the bed, water the soil to help settle it. This will also ensure that the soil is evenly distributed and compacted.
Step 6: Plant Your Garden
The exciting phase is about to begin: planting your garden! You can grow a wide variety of vegetables, herbs, and flowers in a raised bed. Some popular choices for raised garden beds include:
- Tomatoes
- Lettuce
- Carrots
- Zucchini
- Herbs (like basil and parsley)
Be sure to follow planting guidelines for each type of plant, including spacing requirements and sun exposure preferences. Raised garden beds are excellent for planting because the soil is often easier to work with, and the plants receive better drainage and nutrients.
Step 7: Maintain Your Raised Garden Bed
After planting, maintenance is key to keeping your raised garden bed healthy and productive. Some maintenance tips include:
Watering: Raised garden beds often dry out faster than traditional gardens, so make sure to water regularly.
Mulching: Add mulch to help retain moisture and keep the soil temperature stable.
Fertilizing: Since raised beds can deplete nutrients faster, add compost or organic fertilizers regularly to keep the soil rich.
if you need information about how to grow microgreens at home then check out this
Optimize Your Gardening Blog with SEO
If you’re documenting your raised garden bed project or sharing gardening tips online, SEO (Search Engine Optimization) is essential for getting your content noticed. Properly optimized content ensures your posts rank higher in search engine results, helping you attract more readers, fellow gardeners, and potential customers. Whether you’re writing about building garden beds, growing vegetables, or creating DIY gardening solutions, SEO can make your website or blog stand out.
To improve your online visibility and reach more gardening enthusiasts, consider investing in professional SEO services. Check out this SEO service to get started on optimizing your gardening blog and boosting your online presence. With the right SEO strategies, your gardening tips can reach a wider audience and grow your site’s traffic in no time!
Conclusion
Building a raised garden bed with pallets is an excellent way to create a functional, eco-friendly, and affordable garden. It’s a simple process that anyone can do, whether you’re an experienced gardener or a beginner. By following these easy steps on how to build an easily raised garden bed with pallets, you can start growing your vegetables, herbs, and flowers in no time.
With a little effort, you’ll soon be enjoying a bountiful harvest and a beautiful outdoor space—all while being environmentally conscious. So, gather your materials, roll up your sleeves, and get ready to build your own raised garden bed with pallets! Happy gardening!


1 thought on “How to Build an Easy Raised Garden Bed with Pallets”